Archive for the ‘Pen repair’ Category

The Waterman Taperiate Citation

Thursday, June 30th, 2016

This is a true story.  Even professional pen mechanics have their limits……

~~~~~~~~~~~~~~

I had just finished the restoration of a burgundy Waterman Taperite Citation, a pen that I planned to sell. This is the Taperiate with the transparent end, much like the Waterman Hundred Year Pens. Burgundy gets an amber end, and it turned out perfect, and I do mean perfect!  The profile was just right, the transition from clear to the burgundy barrel seamless with a bit of translucency where they overlapped.  It was glorious.

The work completed,  I was looking at the pen quite closely, trying to decide what the pen was worth in such a nicely restored condition.   Maybe $150, maybe more?   The imprint was crisp, the trim clean, the nib wrote quite nicely…   It was a rather nice pen, and I was  quite tempted to keep it.  The only thing was,  the cap didn’t want to click onto the pen the way it was supposed to, and I was fiddling with it (gently) trying to figure out why,  when snap!!   The barrel broke right in half…  Right through the lever box, right through the imprint.  I knew that even if I could solvent weld the barrel back together there would always be a visible reminder that it was repaired, and I would lose at least part of the imprint.  Whatever value that glorious looking barrel had, was now lost.

I sat there for a minute, looking at it in disgust.   There was only one thing to do.   I very carefully separated the lever box and lever with the pressure bar intact (parts is parts!), took the section out, gently laid the two pieces of the barrel on the bench, and then beat the snot out of them with a ball-peen hammer.

~~~~~~~~~~~~~~~~~~~~~~~~~~~~~~~~~~~~~~~

For those of you who have never  seen a Taperite Citation, this is a black one.  I replaced the end on it as well.

You get some idea how nice these pens can be when restored.  But the burgundy in question was much nicer.


What, no refill? …or how to revive a Pentel Clicroller.

Wednesday, May 4th, 2016


I really don’t repair ballpoint pens, but a second post about something that isn’t a fountain pen is going to make it hard to convince people.  But really, don’t ask.  I won’t fix one for you…..

~~~~~~~~~~~~~~~~~~~~~~~

There are occasions where I need to carry a roller ball pen.  Ballpoints  (shudder) aren’t on my radar, but a RB is necessary on occasions, and they roll easily enough that I’ll use one.  My usual choice is a Retro 51 Tornado.  Somehow I’ve accumulated a few.  They have cool designs, nice feel, but the truth is that  most of the time they sit in the turret next to my “office” chair.

Twenty or more years ago Pentel made a pen called the Clicroller. Not too thin, not too fat, the clip is similar to a Sheaffer reminder clip in that you can’t clip it in your pocket with the refill extended.  That’s important if you (like me) are prone to forgetting to turn the knob to retract the point.  The only time I’ve ruined a shirt was with a rollerball in my pocket, never a fountain pen!

Pentel quit making the refills years ago, but the pens are still around.  Some were anodized aluminum, some slim and striped with a matching watch (lost that one), some lacquer with gold plated trim.  Robyn lost the green and gold one that we had…  or one of the boys swiped it.   Not that it matters.  The point is that I went looking for it one day, couldn’t find it,  and never did see the thing again.

To give you an idea what I’m talking about, here are a couple that I picked up at the Chicago show….


A number of years ago I got to thinking, and pulled out my Clicroller with its dried out refill and a pair of calipers, and started noodling around.  It didn’t take long before I figured out that I could fit a short Schmidt refill into the pen, and that it would fit through the cone in front, but it was too short, and didn’t fit into the end of the barrel.  So I made a widget, or adapter if you will, that lets me use the short Schmidt refill in the pen.  V1.0 worked perfectly.  The button on the end of the refill fits into the widget, the long rod on the other end mimics the over all length of the Pentel 8126 and fits into the barrel perfectly. Note in the picture above, that the point of the refill extends just the right distance from the cone.

I was going cheap and quick,  and wanted to see the how the button on the end of the refill fit inside for this one, so  I made it out of acrylic.  Since all of the stress is axial, it worked.

But then I recently picked up the two in the picture, both new, in the box.     So I decided to make a couple more widgets so that the pens can be used again.

At the moment, I have no intention of making these for sale.  I’d have to charge as much for the widget as you are likely to pay for the pens.  So here’s what you need to know if you want to make one yourself.

Use 1/4″ rod stock.  Brass or aluminum will be easy to machine.  You can use Delrin too – I just like the idea of a metal widget.   Overall length is 0.745″  A little shorter is OK, but I wouldn’t go under 0.735″   The length of the narrow end is 0.415″, and its OD is 0.120″, though this isn’t critical.  You can safely go to 0.125″  The hole in the wide end is drilled with a #8 drill, which is 0.199″  There is just enough grip that the widget doesn’t fall off of the end of the refill.   It should be 3/16″ deep not including the tip of the drill.   I drill into the end until the shoulder is even with the end of the work piece, reset to zero, and then drill in 3/16″ using the scale on the tail stock.  Round off the corners with a mill bastard file, and you’re done.  Total time, maybe 10 minutes.

Here’s the Schmidt refill next to the original Pentel refill.  The tip of the orignal Pentel refills and the Schmidt refills are within a thousandths of an inch of each other:

…and a close up of the brass widget, showing the open end:


It should be possible to make a widget so that you use a DIN/Parker refill.  The difference is that instead of a hole for the end of the refill, you have to make it shorter, and with a pin that will fit in the end of the Parker refill.  The Parker will fit in and through the cone on the front of the pen, though you may want to change the spring.  V3 for the Parker is still in process at this writing, though I can tell you that you need to have at least part of it the full 1/4″.   Smaller,  and the clip can’t latch with the mechanism in the forward position.

No silver bullets……

Thursday, October 17th, 2013

Latex sacs in pen are nothing new.  The introduction of the latex sac to hold the ink was however, a radical idea when it was introduced a hundred years ago. (shocking how time flies!)  Radical enough that the “eyedropper” or “safety only” crowd was left scrambling to catch up, and the patent battles that developed were as common as they are today between Samsung and Apple.

The problem is, that wonderful idea had a built in flaw in that the sac starts to break down, heading for the inevitable failure the first time the pen is filled.  It was true back then, and is true a century later.  That flaw spawned a lot of research into alternatives and better materials.  Piston fillers, plunger fillers, aerometric fillers, and eventually the piston converter were all ways to get around the problem of a sac.  But they came with their own set of problems. The development of Parker’s “plyglass” sac (really PVC) was a biggie, and one of the reasons for the popularity of, and long life of, the Parker 51.  I’ve had Esterbrook pens with project numbers stamped on them.  The source was from the estate of a man who was a chemical engineer for Esterbrook.  The only thing that I can think of is that these pens were being put in to real world use to test something, and I think that they were testing rubber compounds for their sacs.  Esterbrooks sacs are the toughest that I’ve seen in any pen.  I often find the pens with the original sac in the pen, many times still in fine shape though the rest of the pen shows evidence of serious use!

Fast forward to today.  The legacy of the latex sac lives on, and it’s disposition to fail, simply leaking, turning to goo and eventually becoming petrified is one of the reasons why I’m in business.  They fail.  Some sooner than others, but they eventually fail.

Those of us who repair pens for a living have seen a startling, indeed perhaps alarming, trend of premature failures in pens sacs happening at an increasing rate over the last 5 or 6 years.  There’s a lot of discussion about the cause, but it often comes back to one of two things – the material used to make the sac, and the ink used in the pen.    When I dig and ask questions about how the pen was used, I find that one of the modern super-saturated “boutique inks” like Noodlers or Private Reserve, or a saturated ink containing red die was used in the pen.  Failure sometimes happens in a matter of a couple of months, sometimes it takes several months or a year.

This is very frustrating for a professional pen mechanic.  We can do everything possible to make a pen write very well, as it should.  We buy the best materials we can to restore the pen, only to see the sac fail in a few months instead of several years later as had been the case a decade ago.  The most likely causes are the things over which we have absolutely no control – the material used to make the sac, and the ink that the owner chooses to use in their pen.

So one asks, why don’t you just use one of the synthetic sacs?  The sacs from north of the border were sold as “silicone” and work very well.  I’ve used them for years.  But some testing in the last year or so revealed that the sacs currently in production are not silicone, but PVC.  “So what?” you say.  They used PVC sacs in Parker 51s for years without any problems.  Well, almost no problems.  We see a fair number of aerometric 51s with sac nipples that are soft…. soft enough that they can fail and tear.  The reason?  The plasticizer leaches out of the PVC and softens the celluloid of the sac nipple.  Once it turns soft, it can not be reversed.  The same thing can happen to a celluloid PEN.  The PVC sac in a Duofold Sr. could soften the barrel from the inside out, and once soft it can not be reversed.  It would take a long time, and we might not notice, but it would happen.  The difference with a 51, or a PVC sac in say a Sheaffer snorkel, is that the sac never comes in contact with the barrel because of the metal sac guard.

So a true silicone sac was developed. The theory being that they are more or less inert, like the PVC are not degraded by contact with ink, and will not release the plasticizer that can have a negative impact on some plastics.  Cool.  Except that they come with their own set of issues.  Silicone doesn’t stick to anything but silicone.  So you have to use a silicone RTV adhesive, and a particular kind that will not release acetic acid as it cures.  And that non corrosive RTV (room temperature vulcanization) should be a type that releases an alcohol VS a ketone.

There was great joy in the shops of pen mechanics because even though you had to use a special adhesive that takes longer to set and therefore slows you down, maybe, just maybe we finally had a sac material that would provide the long life and resistance to damage from modern inks that we desire.

But then we found out about the gas permeability issues of silicone sacs.  The short form here is that the silicone sac allows some gasses to pass through the wall of the sac.  In other words, to some gasses but not the ink, the walls of the sac are porous.  That means that the controlled leak of the fountain pen may not be quite so controlled.  If a pen is stored on it’s side rather than nib up, you could end up with an oozing pen or in the worst cases, a cap full of ink.  I’ve heard of cases where this has happened, but I also have them in several pens, and have had clients testing and watching for oozing without having it happen.

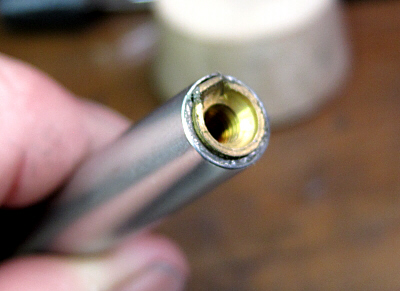
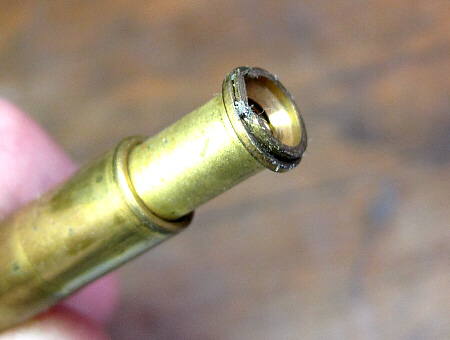
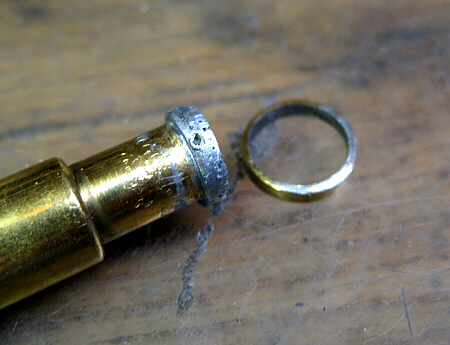
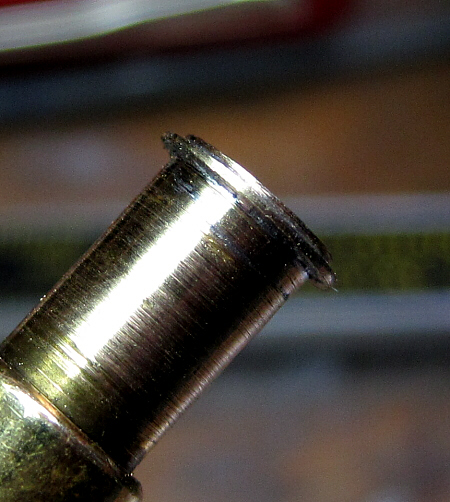
So what should a pen mechanic do?  I still use latex sacs, because they work best in most applications.   They stick better to the sac nipple than PVC or silicone, they fill well, and they are less likely to tear.    They’re the only option for Parker Vacumatic filled pens.  But they are not the best thing to use in a Sheaffer snorkel.  Sac failure usually results in ink in the barrel, and if not corrected in time it means a rusted spring, screw, and in really bad cases damaged sac guards and Touchdown tubes.

Some folks really want their saturated inks, no matter what.  Snorkels demand a synthetic sac to prevent damage to the internal parts, and they’re a good idea on PFM and Touchdown pens too.  But both synthetic sac materials as we have noted have issues.

In general then,  if you want to use a synthetic sac so that you can use you boutique ink,  use a PVC sac in a hard rubber pen or a pen with a sac guard that keeps the sac from contacting the inside of the plastic barrel wall.  But I think that the silicone sac is the better material in most applications as long as you are willing to accept the possibility  (not probability) of oozing.

Every option has it’s trade offs.  There are no silver bullets.


Saving the (Namaki) VP…

Monday, May 7th, 2012

The Namiki Vanishing Point, AKA the VP,  predecessor to the Pilot Capless which is mistakenly called the VP, is one of my favorite pens.  (have I confused you yet?)   I have two or three of them at the moment, and have had three of the fabled “Stealth” models.  I sold the last one before the finish could wear off of the clip.  You’d think that I would have learned when it wore off on the first two, but nooooo.  The pen was just too seductive.  (side note.  Pilot didn’t do a heck of a lot better with the recent Stealth Capless.  …ask me how I know)

I often  said that the ideal pen would have been the pen with a silver clip and a matte black body (like the Stealth) instead of the gloss black body.  I found one at the Philly show back in January, marked Pilot.  Go figure.  It’s loaded and next to my laptop in the shop as I write.

I do have a number of the later Capless pens, but like the smaller and lighter size of the earlier Namiki/Pilot VP.  Lots of people agree.  They do have one weakness though.  The “barrel”  i.e the button end (VS what Pilot calls the “cap” which is the half with the clip) is plastic.  There’s nothing to reinforce it, and the plastic threads engage with metal threads on the cap.  There’s a lot of stress at that joint.  The pens are prone to cracking, the threads to stripping, rendering the pen useless.   But darn it!  We like the pens!

You can solvent weld the cracks, but because of the stress placed on the edge of the barrel when you tighten it enough to stay attached it just cracks again.  Then the threads…  what do you do when the plastic fails and the threads strip off?  The thing is that there’s this brass ring that screws into the barrel that holds the ratchet mechanism in place, so you can’t just glop some glue on and hope to get new threads somehow.

I thought about this for a while, and then started to play with the pens.  David Isaacson says that when I start to play with an idea is when I get dangerous.    But play I did, doing some measuring, ordering of tools, and a little noodling around.  The result is shown below.

The threaded insert is set  into the machined barrel and secured with adhesive.  It addresses both of the common problems.  The threads are now metal to metal instead of plastic to metal, so they will hold up much better.  The brass, instead of the plastic, now carries the stress when the barrel is tightened onto the cap.    The metal threads go back just to the point where the original plastic threads stopped, so the brass retaining ring is positioned where it should be, and stop at the front edge of the barrel.  Not a little below, not a little above, but precisely at the edge.

The picture below shows the barrel tightly screwed into position on the cap.  The hard part is getting the insert positioned so that the facets of the barrel line up properly.   .  It’s a bit tricky and fussy, but it can be done if done with care.   The result feels very solid, and should add many years to the life of the pen.


9/3/2016

This post was written over 4 years ago.  I thought it might be worth adding an update.  In the years since I started providing this repair, I’ve installed the threaded bushing on quite a few of the pens.  Not one has come back, and to my knowledge none have failed.  I have one of my own that has been filled and in use since it was done shortly after the post went up.  The repair works.  As one client put it at the end of his note thanking me for bringing his VP back to life said, “This is how Namiki should have made the pen in the first place!”  I agree.

Why some vintage pens are so pristine….

Monday, April 30th, 2012

Once in a while you run across a vintage pen that is pristine.  I mean the pen is gorgeous, clean, crisp, no brassing, in the box, just as perfect as the day that it was shipped from the factory.  How in the world did it stay that way?

Robyn and I have a theory.  We of course make allowances for things like the pen being NOS, from a store that closed with stock that wasn’t sold.  It happens.  But sometimes the pen has a name on it, or a note with the pen that says “from Madge to Pete with love,” or something like it.

Then you put ink in the pen after restoring it, and put the nib to paper.  YUCK!  The thing scratches, it blobs, it (as one client so colorfully put it) writes like a chicken foot.  It’s awful!!

That’s why it lasted so long.   Someone in the nib department was having a bad day, and the thing was a terrible writer!  It was tested (Thank you dear, it’s lovely!) and then put in drawer. (I’ll save it for special occasions, it’s too nice to carry every day).

The theory was proven yet again with a pen that I just received with an extra fine nib.  Some patient reshaping of the nib, smoothing, and all that and I have a great new pen.  But why didn’t the original owner say something?  Isn’t that what a warranty is for?

Any one else have a story to support our theory?

Why bother?

Tuesday, December 27th, 2011

Many of the things that go trundling through my brain while working start with a thread on FPN.  Lots of fodder there….     The specific post that started me down the multiple rabbit trails was about a cap that wouldn’t screw onto a pen.  It’s repairable, but the owner didn’t especially want to hear the answer that I gave, and thought about buying another cap.  That would work too, but there’s no guarantee that another cap would fit his barrel.  I’ll put that on my list for another post.

But that thread reminded me of something that I’ve had on my mind for some time now.  I’ve been experimenting with replating the trim on pens.  David Isaacson and I have had discussions about how it turns out, Daniel Kirchheimer has a whole page of arguments for and against.  I grant you , it will wear eventually, but it can’t be worse than the plating on a modern Parker Sonnet.  David Nishimura has opined that you’d be better off buying a replacement cap.

Thoughts along the same line come up with celluloid crack repair, or the previously mentioned Parker Vacumatic cap that doesn’t screw onto the barrel.  It’s one of the pens where the cap fits on other pens, but the this cap and barrel won’t work together.  The cap jumps threads, or simply doesn’t engage with the barrel  because the threads on both halves are worn.    The damage can be repaired, but it isn’t necessarily cheap.  “Just buy another cap,”   they say.  Grand.  Simple solution.  Except that the supply of “other caps” is in fact  finite. The same for pens that have clean, unbrassed trim. The same for Parker Vacumatic pumps that are intact, nibs that are crack free and all that.

For years now we’ve had the luxury of throwing NOS parts at damaged pens when we have them, or harvesting parts from other pens to repair the one on the bench, rather than finding appropriate intervention to repair the damage to the pen on the bench.  Instead of repairing or replacing the sac nipple on that 51 aerometric filler or Duofold section we just replace them.   I think that pen repair guys often get to be a bit too casual when repairing pens if they have a large stash of parts because it’s easier to replace than fix.  But we won’t get away with that forever.

At some point we will run out of NOS parts and donor pens, and we’ll rue the day that we so casually tossed a damaged part and reached for the replacement.  Then what will we do with the “family pens” that really can’t be fixed and must have replacement parts to write again?

I would argue that there are (or should be) two primary rules of pen repair, not just one.  First is “do no harm.”  The second should be “replace only when it’s impossible to repair.”   Obviously this requires a higher level set of skills, but to me that’s what professional pen repair is all about.  Anyone can learn to replace a sac, but only some develop the skills needed to truly repair a pen.

Reverse engineering #2

Tuesday, December 13th, 2011

Part of the fun of this job, as well as the frustration, is that I get some really weird and interesting pens to work on.  The fun is that I get to figure things out.  The frustration is that sometimes you look at a pen and realize that you have no clue how you’re going to do what needs to be done.   You say “sure!  I can do that.”  Then when you start to work on the pen you say “how am I going to do that?” The pen below is a classic case in point.

14K 51

It’s a 14K “Parker 51”.  I put quotes around it because those who should know say that Parker never made a 14K (as in solid gold) Parker 51.  But it sure looks like one, but there a few weird elements as we’ll see.  The client handed it to me at a pen show to install a 14K clip.  It was an interesting pen because while it looked like a 51 and the mechanism was stock 51, the barrel and cap were much fatter.  As I worked on the pen I noted other things that were, different, and told the owner that I’d do what I could, but that there was a good chance that we would have to do more extensive work on the cap.  I simply didn’t have the tools or time at the show to correct the problems that I saw.     I installed the clip as requested  and handed the pen back.   Sure enough, a couple of months later they contacted me and asked if they could send the pen to me because the clip had come loose.  I stared at it when it came in and started to ask questions about how a 51 ballpoint was built.  Finally I asked my friend Harry Shubin if he could send one of his original ballpoints to me for reference.

First, a correct 51.  The clip on a ballpoint is the same size as a pencil, so smaller than the fountain pen’s clip.  This is Harry’s Parker 51 with the jewel, clip screw and clip removed.  Note that there is a tab that sticks up from the mechanism AND the cap to keep the clip from rotating, and that the mechanism pokes through the top of the cap.  There is also a shoulder on the mechanism that the clip fits over to keep it centered on the cap.  The big problem is that the gold pen’s cap is much larger than the stock cap so the mechanism fell right through the top.   The clip is fatter because it’s not a  ballpoint clip but a fountain pen clip.  Fun.

With the mechanism removed from the stock 51, we can see that there is a lip that the mechanism fits under that keeps the mechanism from poking through the top.

The original mechanism also has a flange on it that sits below the lip on the cap.  The clip, held in place by the clip screw, and that clamps everything together.  Note too that when the cap is pressed down, the whole mechanism goes down, stopping just before the flange hits the tube below.  That’s important as we will see later.

This is what the top of the gold cap looked like.  Do you see what’s missing?

And the gold 51 mechanism.

What is missing from the cap of course is the lip that keeps the mechanism from going through.  To try to compensate, someone had soldered a brass ring onto the top of the mechanism.  Nice idea, but it didn’t work.  One problem was that they used ordinary solder – along the lines of 60/40 solder  or plumbing solder which doesn’t have the strength of silver bearing solder or silver solder.  The second problem was that it was simply too thin.  While it was supposed to stop in the cap, it didn’t but wanted to slip right through, which was the problem that I saw when I first worked on the pen.  Eventually it did slip through, which is why it came back to me.

The first step then was to clean off all of the solder and return the mechanism to it’s original configuration.

Now, how to fit it into the pen.  You don’t see it when you look at the cap in the picture above, but there is taper to the top of the cap.  The solution then was to take advantage of this taper, which is what they tried to do with the original setup.  But their ring was too short, so the taper didn’t “jam” into the cap as it needed to.  Staying with brass, which is strong and  easier to machine, I  used rod stock that was the same diameter as the opening of the cap, and then tapered it so that just a bit stuck out the top.  The piece stopped against the taper with just a bit sticking beyond the cap.   I then machined a step into the top like the mechanism has for the clip to slip over.   The easy part was done.

The inside was a bit trickier.  I needed two steps.  One for the flange to stop against, and another to center the flange.  The ID of the sleeve had to be larger than the flange because the sleeve had to clear the body of the mechanism,  which is wider than the flange.  No doubt this is why the the last person to work on the pen had used a thinner ring.  A bit tricky, and took a lot of careful measuring, but it worked.

Here’s a picture of the sleeve on the mechanism.  It slips freely over the body of the mechanism.

The top of the sleeve with the  mechanism inside.  The top of the mechanism is just a bit below the end of the sleeve.

And finally, with the cap in place

Alignment of the parts proved to be critical, but when aligned and the clip screw tightened down, it all held securely.  No adhesives used or soldering done.  In theory at least, the owner could slip in a standard mechanism should this one fail with the only modification the removal of the tab that holds the clip in place.  The end result is of course the picture at the top.

I only scrapped out once.  Total time involved?  More than I would like, but less than it could have been.  Satisfaction of both ends (mine and the owners)?  Quite high, thank you!

The Pen That Started it All…

Tuesday, December 6th, 2011

OK, almost started it all.

Back in the late 80s a co-worker gave a couple of pens to me.  They had been her mothers, and she knew that I liked fountain pens.  A simple Esterbrook SJ, and a Parker Parkette Deluxe.  Nothing big but to a neophyte,  exciting.  Both needed to be repaired, but I had no idea how to do it. BUT, I had heard about this guy in Center City Philadelphia who “could repair any pen made, going back to 1900.”  So I tracked the shop down, and sent my pens off to Mr Russel at Tuckers Pen Hospital down on Chestnut street, near I. Goldbergs, just a couple blocks west of Independence Mall.  We won’t discuss my impatience to have the pen repaired.

The pen needed a nib, needed to be resaced, and generally restored.  Total bill when he was done, an astonishing $145 and change.  (For reference, in the late 80s he was charging $90 to restore a Sheaffer Snorkel).  I still have the receipt somewhere, and may even have the shipping tube.  I certainly do have the pen, 23 years or so later.

1st Quarter 1935 Parkette Deluxe

It’s a nice pen, great color, with a medium nib that writes smoothly.  I don’t know where Mr Russel got his sacs, but I would love to know.  I pulled the pen apart the other day, and found that the sac is as clean and fresh and good as it was the day it was installed.  I know it’s the same sac because it’s stamped in bright orange Tuckers Pen Hospital.

The one think that I didn’t like was the treatment of the brassed trim.  Everything was brassed.  Since my parents lived about 30 miles outside of the city at the time, I went down to pick up the pen.  When I commented on the brassed trim, he disappeared with the pen back into the repair area.    My memory is that he appeared a bit later with the pen in hand, the trim shiny and bright.  He said “I put something on it, nobody will ever know.”  Except that I knew, and that the surface of the celluloid now had a slightly stippled look to it.  The lacquer or whatever he sprayed on it eventually wore off, and the brassing was back.   I finally took care of that little issue this past week by cleaning the metal, and then plating it.  Now you can see why these were popular pens.  Thin plating, yes, but still a quality Parker pen, comparable in size to the Challengers and Duofold Jrs of the day.

I sent one or two more little items off to Tuckers, and then quickly learned that if I wanted to collect on my radio engineer’s income, I needed to learn how to repair.  About the same time, I came across repair manuals from the Pen Fancier’s Club and heard about the Pen Sac Co.  The rest, as they say, is history. Within a year or so after receiving the Parkette I was haunting every antique show in town, and buying anything of interest just to be able to repair the pens.  The habits and skills developed over 20 years ago are with me today – I still repair a pen as if it were going into my own collection, not just to push it out the door.  It’s a habit that I don’t intend to change.

A footnote to the story.  Years later David Isaacson called me and told me about a guy from Philadelphia who was selling a bunch of pen stuff.  It seemed that his father had owned a pen repair shop in Philadelphia.  As he rambled on  I got to thinking, and then interrupted.  “Is the guy’s last name Russel?” I asked.  It was.    The elder Mr Russel gone, the shop closed.  But I will never forget visiting that little shop on the second floor down on Chestnut St, and the excitement of being in a pen repair shop, seeing other vintage pens, picking up my repaired Parkette and inking it.

I’m going to keep this pen – if nothing else to remind me of the wonder and excitement of being a new collector, and to get to ink that newly repaired pen for the first time.  I repair pens, but what makes it special is to make the people who own them happy.

The most dangerous moment…..

Wednesday, November 23rd, 2011

I’ve had people suggest that I hire someone to help me with pen repairs.  “Let them do the easy stuff like recacing pens,” they say.   But there’s one thing that I have to do, and  until they’re really skilled it’s too dangerous to just hand them the pen and tell them to go at it.  So three guesses.  What’s the most dangerous moment in pen repair?

Knocking out the nib and feed?

Nope.

Resetting the nib after cleaning?

Nope.

Taking the filler out of a Parker 51?  Close.

The single most dangerous moment in pen repair is opening the pen to restore it, across the board, without exception.

Sometimes a lever filler will almost fall apart for you.  Sometimes it does fall apart, but that’s another thread.  Even so when parts are loose there are risks because there may be a surprise lurking before the section comes out.  But when a pen is really stuck together, you start sweating bullets, antennas go up, and your fingers go to maximum sensitivity.  It’s the first moment of your journey in restoring the pen, when you and the pen test each other and get to know what the issues are.  It’s the moment of the great unveiling of surprises, and the one moment when you are inclined to be the most hasty (thank you Treebeard).

The inclination is to think “but I have to get the pen apart if I’m going to repair it!…”  and then we start to crank on the section. True, you do have to open the pen, but if you try too hard the barrel can crack, it can sheer off, it can distort, the section can snap off….   I’ve done it all.

SO, how do we avoid breaking the pen?  Start with gentle, dry heat applied by a heat gun.  I like the craft embossing guns with the 1/2″ or so opening.  Warm gently, twist, wiggle a bit, warm gently, twist, wiggle a bit,  repeat, becoming ever so slightly more aggressive.  Been at five 5 minutes?  What,  you expect to beat a 60 year old pen that quickly?  Maybe ten minutes?  Getting better.  Take whatever amount of time it takes to open the pen.  You can be a little more aggressive with the heat on hard rubber, a little less on 40’s Sheaffer plunger fillers.  Just take your time.

I won’t say that the problems are over once the pen is open, but that’s what I consider to be the critical, the most dangerous moment in pen repair.  The second – putting it back together.  Again, heat is your friend.  But that’s yet another whole post.

Bad repairs bug me.

Wednesday, November 16th, 2011

There’s a reason why I say  that professional pen repair involves a lot more than knowing how to replace a sac.

Repairing pens as I do, I see a lot of repairs that are done by what I’m not sure,  but repair mechanic doesn’t apply.  Sometimes I think that a monkey could have done a better job, but those are the extreme cases.  Often the repairs are a bit more “creative” than they should be, and at other times whomever worked on the pen just didn’t have their thinking cap on.

Two cases today.  Pen #1 was a Parker 51 aerometric with the early “press 6 times” sac guard, and a chrome, polished cap with a black jewel.  I don’t know if the owner knows that the cap is from a 51 Special or not.  I decided not to bring it up since they seemed to be content with it. If someone sends a 51 aerometric to me to restore, I check the plyglass sac, but don’t routinely replace them.  I believe that nothing that we have today is better than an intact, properly functioning plyglass sac.  Maybe a silicone sac will last longer, but I doubt it.

So problem #1 – replacing a plyglass sac with a latex sac, which of course had failed.   Plyglass sacs should be replaced only under two conditions; a punctured sac (it happens) or a damaged/soft sac nipple.  If the later, the connector has to be replaced or repaired (new sac nipple installed) and a new sac installed.

Problem #2 was that the sterling silver breather tube had been replaced with (this is creative) 1/2 WD-40 spray tubing, and 1/2 original celluloid tubing, glued and jammed together, which didn’t hold together.  On top of that they had bored out the feed to take the larger tubing, which meant that the hole in the end of the feed was now oversize.  There is a way to sleeve a feed to take the standard size stainless replacements that I make, but we could have ended up replacing that too.  The right breather tube does make a difference.

The second pen was a Conway Stewart.  Pretty pen, but it didn’t fill right, and of course didn’t write well.  When I opened the pen I was surprised to find that the sac was good, and relatively new.  But there was something rather hard inside inside the sac.  I pulled it off, and found the problem.    The feed was a replacement feed, I assume installed at the last repair.  It stuck out about 1/2″ beyond the end of the sac nipple, instead of being flush or below the edge, which was why the pen wouldn’t fill.  Sticking out that far it slipped under the end of the J bar and interfered with it’s operation.  The lever might flex the J bar a bit.  But the sac wasn’t compress enough if at all, and the pen couldn’t fill.  I knocked out the nib and feed to make sure that they were clean and clear. I then reassembled to mark the feed, knocked it out to cut it to the right length, and assembled again.  The pen fills just fine, and writes nicely.

“So,” you’re asking, “where are we going with this?”  Two things, maybe three.

First is that if you are going to repair pens you should have some idea how they are designed, and an understanding of why they were made the way that they were.  Sometimes we have to be creative with our repairs.  But often procedures are followed, and materials used simply because they are expedient.  “Fix it” and get it out the door instead of making sure that the repair is as close to the original configuration as possible and that it is done right.

Second,  we need to think about what we’re doing.  If the person who put that feed in the Conway  Stewart had simply observed (thank you Sherlock) they would have known that the pen wouldn’t work, that it couldn’t possibly fill properly with the feed that long.  But they didn’t change the length of the feed.  They weren’t thinking.

Third, a pen should always be tested, i.e filled and written with, before it goes out the door.  ALWAYS.   I can’t believe that whomever worked on the pen  had tested it before sending it out.  If they had, they would have known that the pen wasn’t working.

All a little more than just replacing a sac, don’t you think?