Archive for December, 2011

Why bother?

Tuesday, December 27th, 2011

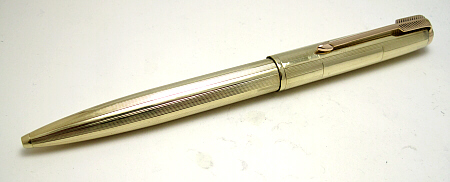
Many of the things that go trundling through my brain while working start with a thread on FPN.  Lots of fodder there….     The specific post that started me down the multiple rabbit trails was about a cap that wouldn’t screw onto a pen.  It’s repairable, but the owner didn’t especially want to hear the answer that I gave, and thought about buying another cap.  That would work too, but there’s no guarantee that another cap would fit his barrel.  I’ll put that on my list for another post.

But that thread reminded me of something that I’ve had on my mind for some time now.  I’ve been experimenting with replating the trim on pens.  David Isaacson and I have had discussions about how it turns out, Daniel Kirchheimer has a whole page of arguments for and against.  I grant you , it will wear eventually, but it can’t be worse than the plating on a modern Parker Sonnet.  David Nishimura has opined that you’d be better off buying a replacement cap.

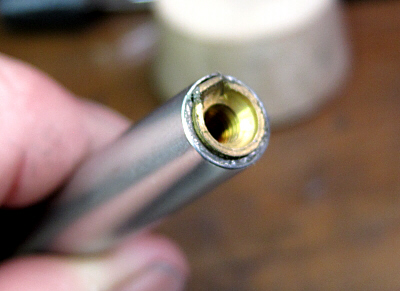
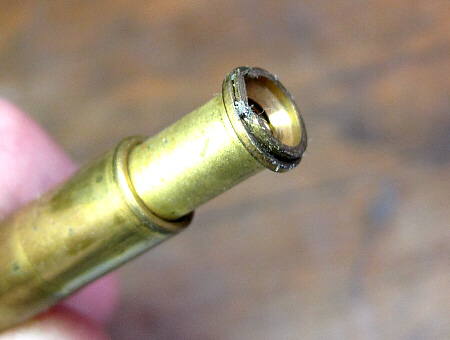
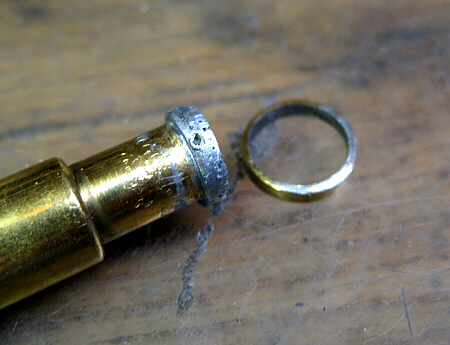
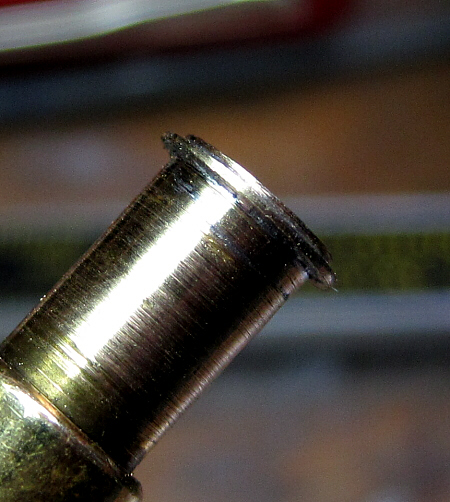
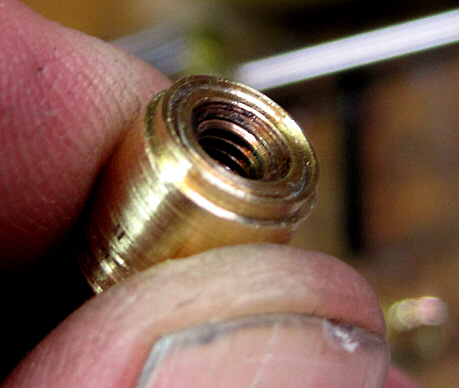
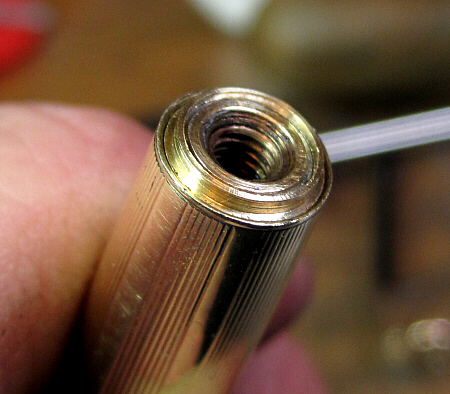
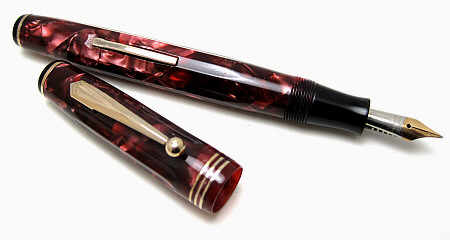
Thoughts along the same line come up with celluloid crack repair, or the previously mentioned Parker Vacumatic cap that doesn’t screw onto the barrel.  It’s one of the pens where the cap fits on other pens, but the this cap and barrel won’t work together.  The cap jumps threads, or simply doesn’t engage with the barrel  because the threads on both halves are worn.    The damage can be repaired, but it isn’t necessarily cheap.  “Just buy another cap,”   they say.  Grand.  Simple solution.  Except that the supply of “other caps” is in fact  finite. The same for pens that have clean, unbrassed trim. The same for Parker Vacumatic pumps that are intact, nibs that are crack free and all that.

For years now we’ve had the luxury of throwing NOS parts at damaged pens when we have them, or harvesting parts from other pens to repair the one on the bench, rather than finding appropriate intervention to repair the damage to the pen on the bench.  Instead of repairing or replacing the sac nipple on that 51 aerometric filler or Duofold section we just replace them.   I think that pen repair guys often get to be a bit too casual when repairing pens if they have a large stash of parts because it’s easier to replace than fix.  But we won’t get away with that forever.

At some point we will run out of NOS parts and donor pens, and we’ll rue the day that we so casually tossed a damaged part and reached for the replacement.  Then what will we do with the “family pens” that really can’t be fixed and must have replacement parts to write again?

I would argue that there are (or should be) two primary rules of pen repair, not just one.  First is “do no harm.”  The second should be “replace only when it’s impossible to repair.”   Obviously this requires a higher level set of skills, but to me that’s what professional pen repair is all about.  Anyone can learn to replace a sac, but only some develop the skills needed to truly repair a pen.

Reverse engineering #2

Tuesday, December 13th, 2011

Part of the fun of this job, as well as the frustration, is that I get some really weird and interesting pens to work on.  The fun is that I get to figure things out.  The frustration is that sometimes you look at a pen and realize that you have no clue how you’re going to do what needs to be done.   You say “sure!  I can do that.”  Then when you start to work on the pen you say “how am I going to do that?” The pen below is a classic case in point.

14K 51

It’s a 14K “Parker 51”.  I put quotes around it because those who should know say that Parker never made a 14K (as in solid gold) Parker 51.  But it sure looks like one, but there a few weird elements as we’ll see.  The client handed it to me at a pen show to install a 14K clip.  It was an interesting pen because while it looked like a 51 and the mechanism was stock 51, the barrel and cap were much fatter.  As I worked on the pen I noted other things that were, different, and told the owner that I’d do what I could, but that there was a good chance that we would have to do more extensive work on the cap.  I simply didn’t have the tools or time at the show to correct the problems that I saw.     I installed the clip as requested  and handed the pen back.   Sure enough, a couple of months later they contacted me and asked if they could send the pen to me because the clip had come loose.  I stared at it when it came in and started to ask questions about how a 51 ballpoint was built.  Finally I asked my friend Harry Shubin if he could send one of his original ballpoints to me for reference.

First, a correct 51.  The clip on a ballpoint is the same size as a pencil, so smaller than the fountain pen’s clip.  This is Harry’s Parker 51 with the jewel, clip screw and clip removed.  Note that there is a tab that sticks up from the mechanism AND the cap to keep the clip from rotating, and that the mechanism pokes through the top of the cap.  There is also a shoulder on the mechanism that the clip fits over to keep it centered on the cap.  The big problem is that the gold pen’s cap is much larger than the stock cap so the mechanism fell right through the top.   The clip is fatter because it’s not a  ballpoint clip but a fountain pen clip.  Fun.

With the mechanism removed from the stock 51, we can see that there is a lip that the mechanism fits under that keeps the mechanism from poking through the top.

The original mechanism also has a flange on it that sits below the lip on the cap.  The clip, held in place by the clip screw, and that clamps everything together.  Note too that when the cap is pressed down, the whole mechanism goes down, stopping just before the flange hits the tube below.  That’s important as we will see later.

This is what the top of the gold cap looked like.  Do you see what’s missing?

And the gold 51 mechanism.

What is missing from the cap of course is the lip that keeps the mechanism from going through.  To try to compensate, someone had soldered a brass ring onto the top of the mechanism.  Nice idea, but it didn’t work.  One problem was that they used ordinary solder – along the lines of 60/40 solder  or plumbing solder which doesn’t have the strength of silver bearing solder or silver solder.  The second problem was that it was simply too thin.  While it was supposed to stop in the cap, it didn’t but wanted to slip right through, which was the problem that I saw when I first worked on the pen.  Eventually it did slip through, which is why it came back to me.

The first step then was to clean off all of the solder and return the mechanism to it’s original configuration.

Now, how to fit it into the pen.  You don’t see it when you look at the cap in the picture above, but there is taper to the top of the cap.  The solution then was to take advantage of this taper, which is what they tried to do with the original setup.  But their ring was too short, so the taper didn’t “jam” into the cap as it needed to.  Staying with brass, which is strong and  easier to machine, I  used rod stock that was the same diameter as the opening of the cap, and then tapered it so that just a bit stuck out the top.  The piece stopped against the taper with just a bit sticking beyond the cap.   I then machined a step into the top like the mechanism has for the clip to slip over.   The easy part was done.

The inside was a bit trickier.  I needed two steps.  One for the flange to stop against, and another to center the flange.  The ID of the sleeve had to be larger than the flange because the sleeve had to clear the body of the mechanism,  which is wider than the flange.  No doubt this is why the the last person to work on the pen had used a thinner ring.  A bit tricky, and took a lot of careful measuring, but it worked.

Here’s a picture of the sleeve on the mechanism.  It slips freely over the body of the mechanism.

The top of the sleeve with the  mechanism inside.  The top of the mechanism is just a bit below the end of the sleeve.

And finally, with the cap in place

Alignment of the parts proved to be critical, but when aligned and the clip screw tightened down, it all held securely.  No adhesives used or soldering done.  In theory at least, the owner could slip in a standard mechanism should this one fail with the only modification the removal of the tab that holds the clip in place.  The end result is of course the picture at the top.

I only scrapped out once.  Total time involved?  More than I would like, but less than it could have been.  Satisfaction of both ends (mine and the owners)?  Quite high, thank you!

The Pen That Started it All…

Tuesday, December 6th, 2011

OK, almost started it all.

Back in the late 80s a co-worker gave a couple of pens to me.  They had been her mothers, and she knew that I liked fountain pens.  A simple Esterbrook SJ, and a Parker Parkette Deluxe.  Nothing big but to a neophyte,  exciting.  Both needed to be repaired, but I had no idea how to do it. BUT, I had heard about this guy in Center City Philadelphia who “could repair any pen made, going back to 1900.”  So I tracked the shop down, and sent my pens off to Mr Russel at Tuckers Pen Hospital down on Chestnut street, near I. Goldbergs, just a couple blocks west of Independence Mall.  We won’t discuss my impatience to have the pen repaired.

The pen needed a nib, needed to be resaced, and generally restored.  Total bill when he was done, an astonishing $145 and change.  (For reference, in the late 80s he was charging $90 to restore a Sheaffer Snorkel).  I still have the receipt somewhere, and may even have the shipping tube.  I certainly do have the pen, 23 years or so later.

1st Quarter 1935 Parkette Deluxe

It’s a nice pen, great color, with a medium nib that writes smoothly.  I don’t know where Mr Russel got his sacs, but I would love to know.  I pulled the pen apart the other day, and found that the sac is as clean and fresh and good as it was the day it was installed.  I know it’s the same sac because it’s stamped in bright orange Tuckers Pen Hospital.

The one think that I didn’t like was the treatment of the brassed trim.  Everything was brassed.  Since my parents lived about 30 miles outside of the city at the time, I went down to pick up the pen.  When I commented on the brassed trim, he disappeared with the pen back into the repair area.    My memory is that he appeared a bit later with the pen in hand, the trim shiny and bright.  He said “I put something on it, nobody will ever know.”  Except that I knew, and that the surface of the celluloid now had a slightly stippled look to it.  The lacquer or whatever he sprayed on it eventually wore off, and the brassing was back.   I finally took care of that little issue this past week by cleaning the metal, and then plating it.  Now you can see why these were popular pens.  Thin plating, yes, but still a quality Parker pen, comparable in size to the Challengers and Duofold Jrs of the day.

I sent one or two more little items off to Tuckers, and then quickly learned that if I wanted to collect on my radio engineer’s income, I needed to learn how to repair.  About the same time, I came across repair manuals from the Pen Fancier’s Club and heard about the Pen Sac Co.  The rest, as they say, is history. Within a year or so after receiving the Parkette I was haunting every antique show in town, and buying anything of interest just to be able to repair the pens.  The habits and skills developed over 20 years ago are with me today – I still repair a pen as if it were going into my own collection, not just to push it out the door.  It’s a habit that I don’t intend to change.

A footnote to the story.  Years later David Isaacson called me and told me about a guy from Philadelphia who was selling a bunch of pen stuff.  It seemed that his father had owned a pen repair shop in Philadelphia.  As he rambled on  I got to thinking, and then interrupted.  “Is the guy’s last name Russel?” I asked.  It was.    The elder Mr Russel gone, the shop closed.  But I will never forget visiting that little shop on the second floor down on Chestnut St, and the excitement of being in a pen repair shop, seeing other vintage pens, picking up my repaired Parkette and inking it.

I’m going to keep this pen – if nothing else to remind me of the wonder and excitement of being a new collector, and to get to ink that newly repaired pen for the first time.  I repair pens, but what makes it special is to make the people who own them happy.