Saving the (Namaki) VP…
Monday, May 7th, 2012The Namiki Vanishing Point, AKA the VP, predecessor to the Pilot Capless which is mistakenly called the VP, is one of my favorite pens. (have I confused you yet?) I have two or three of them at the moment, and have had three of the fabled “Stealth” models. I sold the last one before the finish could wear off of the clip. You’d think that I would have learned when it wore off on the first two, but nooooo. The pen was just too seductive. (side note. Pilot didn’t do a heck of a lot better with the recent Stealth Capless. …ask me how I know)
I often said that the ideal pen would have been the pen with a silver clip and a matte black body (like the Stealth) instead of the gloss black body. I found one at the Philly show back in January, marked Pilot. Go figure. It’s loaded and next to my laptop in the shop as I write.
I do have a number of the later Capless pens, but like the smaller and lighter size of the earlier Namiki/Pilot VP. Lots of people agree. They do have one weakness though. The “barrel” i.e the button end (VS what Pilot calls the “cap” which is the half with the clip) is plastic. There’s nothing to reinforce it, and the plastic threads engage with metal threads on the cap. There’s a lot of stress at that joint. The pens are prone to cracking, the threads to stripping, rendering the pen useless. But darn it! We like the pens!
You can solvent weld the cracks, but because of the stress placed on the edge of the barrel when you tighten it enough to stay attached it just cracks again. Then the threads… what do you do when the plastic fails and the threads strip off? The thing is that there’s this brass ring that screws into the barrel that holds the ratchet mechanism in place, so you can’t just glop some glue on and hope to get new threads somehow.
I thought about this for a while, and then started to play with the pens. David Isaacson says that when I start to play with an idea is when I get dangerous. But play I did, doing some measuring, ordering of tools, and a little noodling around. The result is shown below.

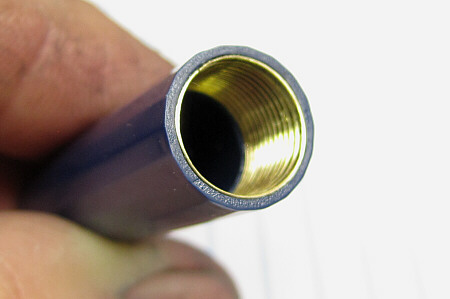
The threaded insert is set into the machined barrel and secured with adhesive. It addresses both of the common problems. The threads are now metal to metal instead of plastic to metal, so they will hold up much better. The brass, instead of the plastic, now carries the stress when the barrel is tightened onto the cap. The metal threads go back just to the point where the original plastic threads stopped, so the brass retaining ring is positioned where it should be, and stop at the front edge of the barrel. Not a little below, not a little above, but precisely at the edge.
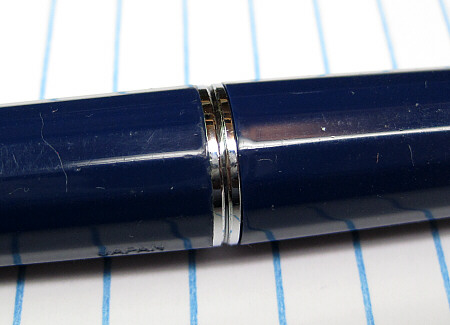
The picture below shows the barrel tightly screwed into position on the cap. The hard part is getting the insert positioned so that the facets of the barrel line up properly. . It’s a bit tricky and fussy, but it can be done if done with care. The result feels very solid, and should add many years to the life of the pen.

9/3/2016
This post was written over 4 years ago. I thought it might be worth adding an update. In the years since I started providing this repair, I’ve installed the threaded bushing on quite a few of the pens. Not one has come back, and to my knowledge none have failed. I have one of my own that has been filled and in use since it was done shortly after the post went up. The repair works. As one client put it at the end of his note thanking me for bringing his VP back to life said, “This is how Namiki should have made the pen in the first place!” I agree.
